For the gloves I used:
- 1 meter of long fur for the right arm
- 1/2 a meter of striped fabric for the left arm
- Hot glue
- Pair of garden gloves
- 1 inch wide elastic
- Black food dye/ black fabric dye
- Fur shaver (optional)
- Needle and thread
- Paper and pencil
- Masking tape
- Glad-wrap
I think that was everything. The first thing I did was make the lion glove using following this video tutorial. Note that I made a glove and sleeves if you wanted you could make the glove attacked to the sleeve but I wanted to be able to take the glove off without taking of my shirt all of the time.
Hand Paw Tutorial Part 1
Hand Paw Tutorial Part 2
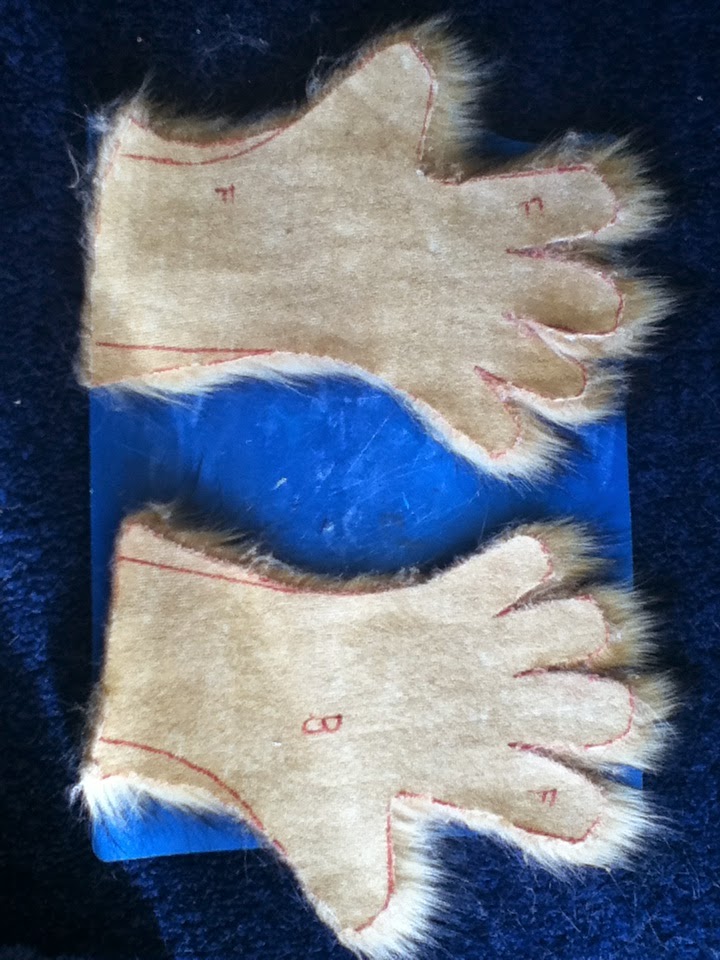
So starting out I traced my hand onto a piece of paper the re-drew the line making my hand about 2cm bigger. At my wrist I gave myself about 3-4cm on each side. I then cut out the paper and traced it onto my fur making cutting the shape out once then flipping it and cutting the shape again so I had the top and bottom of the glove. I then marked the inside with a Sharpe so that I new which side was which.
I then got my fur shaver and shaved the palm side of my fur down so it was much shorter.Which on the image above was the hand with the 'f' on it for front (the other was 'b' for back).
With the garden gloves I mixed some red, blue and yellow food colouring together in order to get black and painted the fingers and palm of the glove (the food colouring stayed because I was absorbed by the leathery fabric).
What was supposed to happen was that I was to glue the fur onto the glove but this didn't work out so I cut the dyed fingers and palm from the glove, cut holes in the underside (shaved side) of the fur pieces and hot glued them on. ^^' I know not the most genius method, but it worked.
Then with right sides together I sewed from one side of the wrist all the way over the fingers to the other wrist of the fabric with a blanket stitch. Then I turned it right side out and voila the lion paw glove.
To make the sleeves I started with the eagle arm. With a friend helping me I wrapped my arm in glad-wrap and the with a couple of layers of masking tape. This was to make a sleep pattern to the shape and length of my arm. I cut it off along the underside of my arm, because that was wear I wanted the seam to be. Then I traced it onto my striped fabric making sure the stripes went horizontal down the length of my arm and cut it out. I then blanket stitched the sides together, rolled hemmed the edges and that was one sleeve down.
Using the pattern form the left arm I placed it on my fur fabric. I wanted this arm to be very bulky so I traced the width about 2.5 inches bigger on each side. I cut this out and then blanket stitched the sides together. There was no need to hem the edges because the fabric didn't fray.
I also did my research and looked up how to make fursuit partial arm sleeves and gloves. I used this example for joining the sleeves together.
This tutorial was made by Chaoticdino, I think, on Deviant Art.
As you can see I attached the sleeves in the same way, I measured my shoulder width and then trimmed it shorter so that the elastic would hold up the sleeves and stretch as I moved.
That's how I made my Discord gloves and arm sleeves I hope this helped anyone who may want to make a Discord costume. My next post will be on the pants.


No comments:
Post a Comment